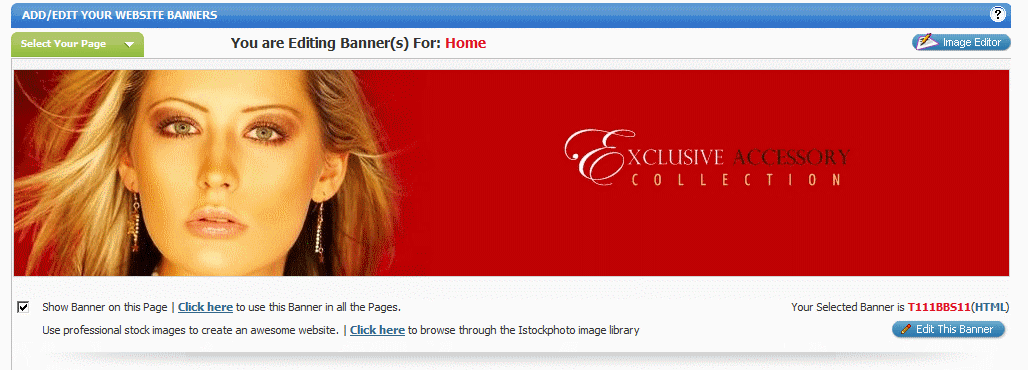
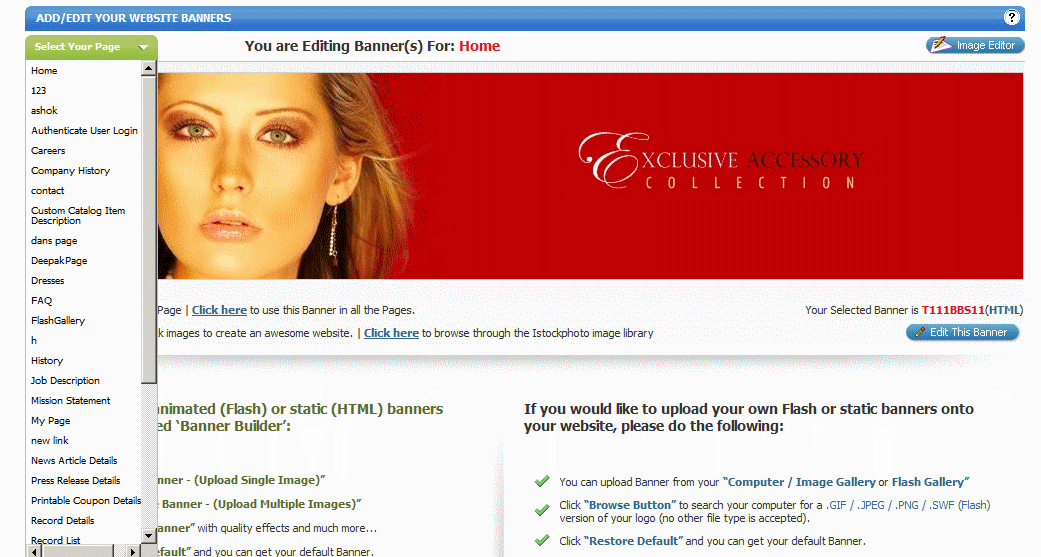
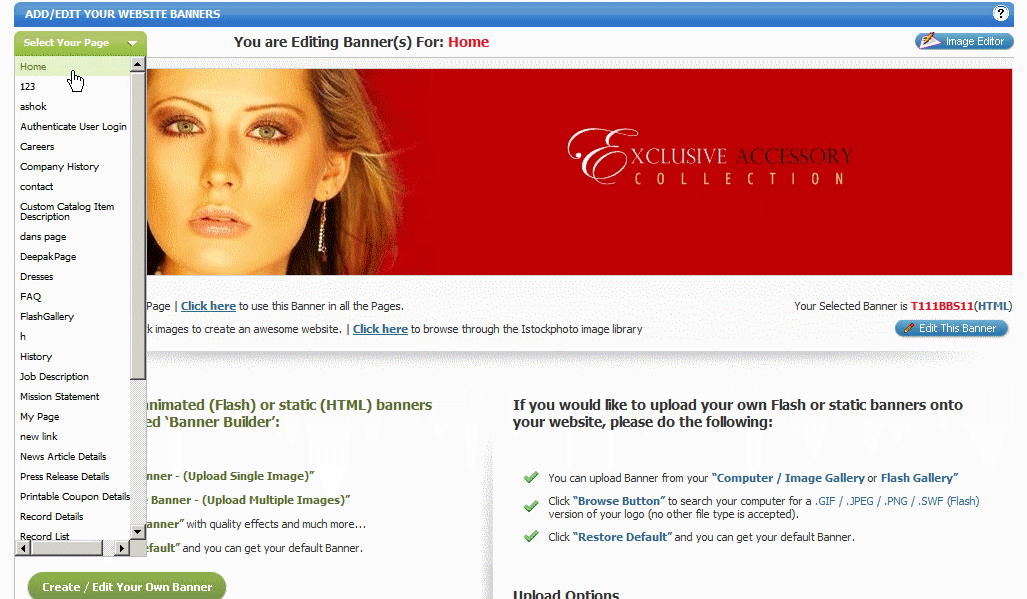
You can also select the page that you want the Static HTML Banner to show on by selecting from the dropdown menu "Select Your Page" This will allow you to choose the page you wish to Add/Edit your Static/ HTML banner on
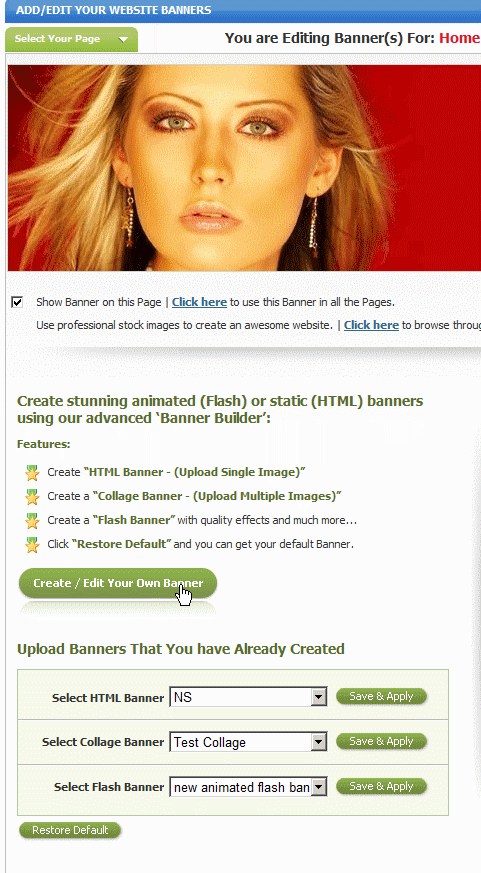
Next, click on "Create/Edit Your Own Banner" down the left hand side of the page
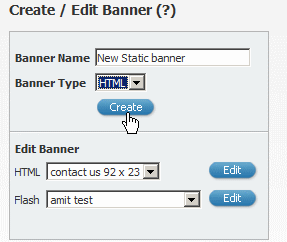
Under the ‘Create / Edit Banner’ header, add in the name that you would like to identify the banner (this is for your reference only) and select ‘html’ as the ‘Banner Type’. Then click on the ‘create’ button.
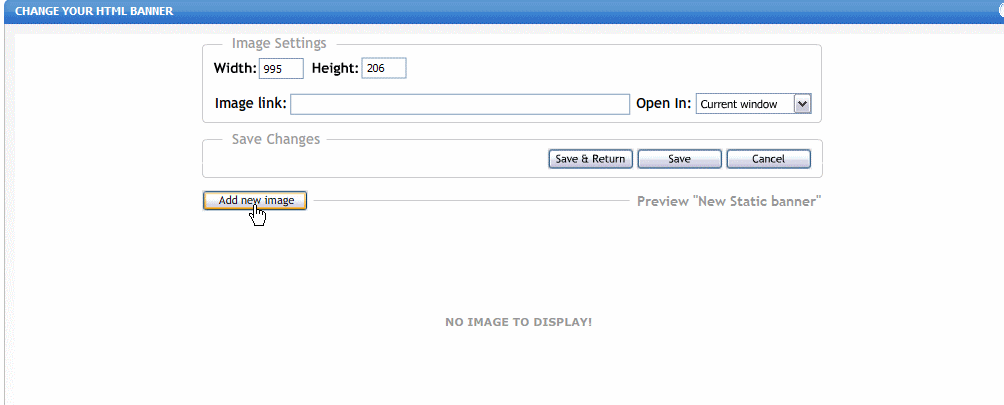
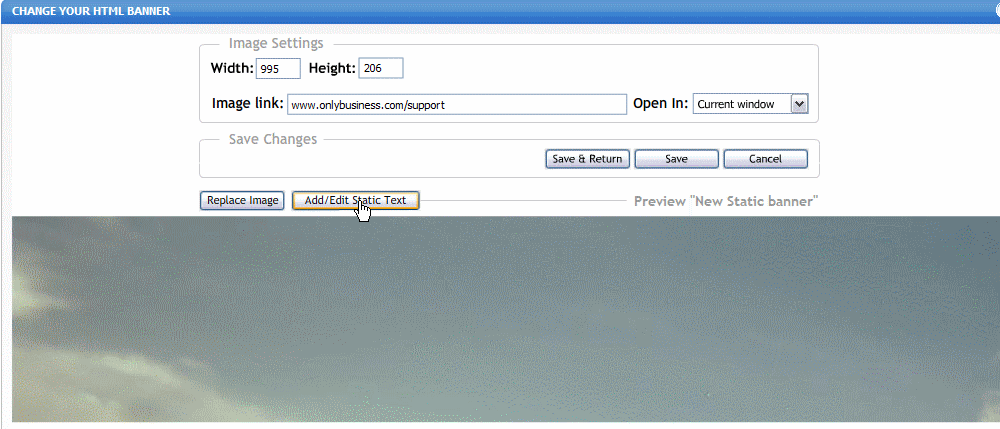
Under "Image Settings", you will see the width and height of the banner from the design you selected. For best results, you should size the image you are uploading accordingly to that W X H. Or, you can change the width and height to any dimensions you want. A great free image editor is available at http://www.pixlr.com/editor/
Click "Add new image" to upload an image from your computer
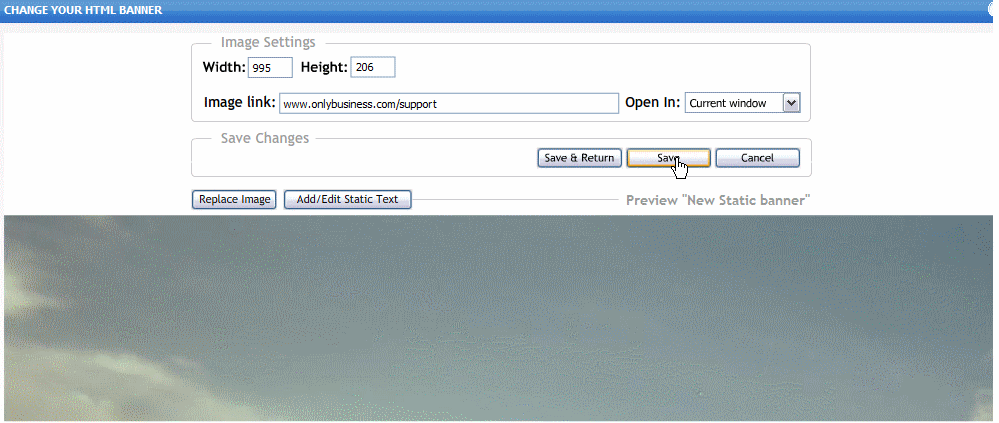
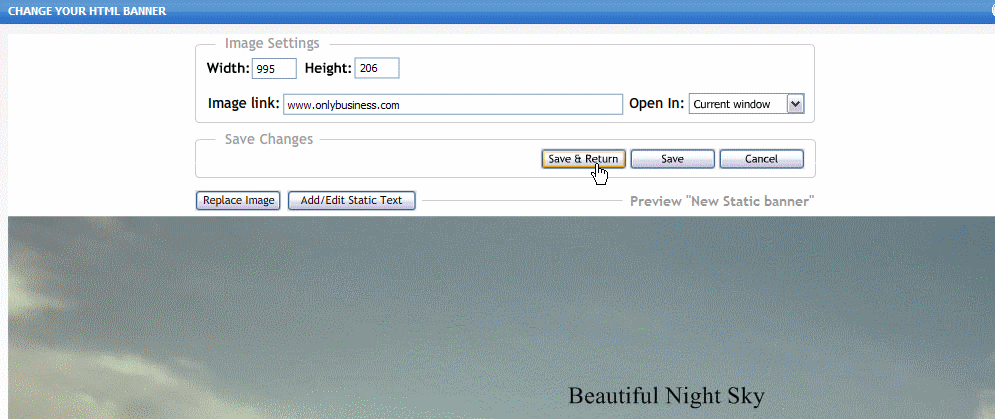
You will see your new image in the preview area. You can choose to add in a image link so that when a user clicks the banner it will take them to a page in your website, or to an external website. You can choose to have it open in the Current Window or in a New Window (browser) Click "Save once completed
To replace the image you uploaded, click on"Replace Image" to upload a new image
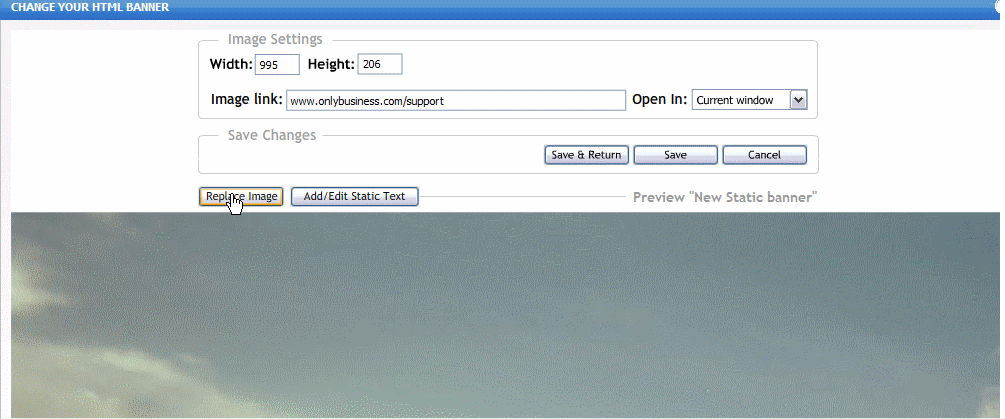
To Add / Edit Static Text on the banner, click "Add/Edit Static Text"
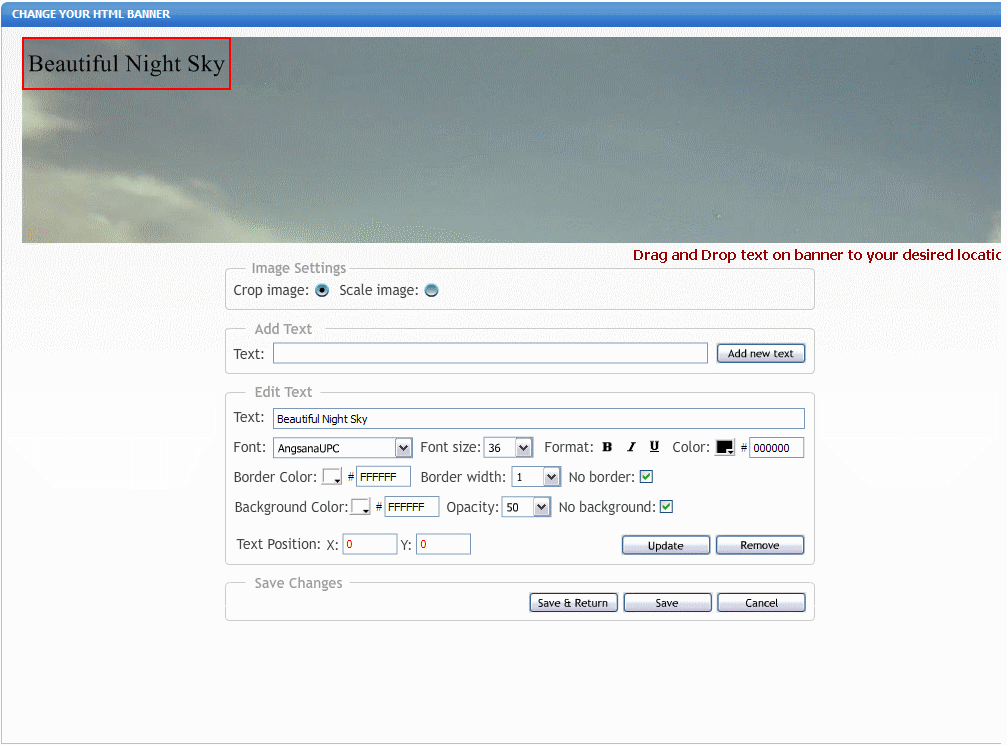
You can then write your text into the text box below the ‘Add Text’ header.
You then click the ‘Add New text’ button.
This will add your new text in the top left hand corner of your image area (seen by a red ‘highlight block’), which you can ‘click-and-drag’ (with your mouse) to reposition it on the image. (Second screenshot)
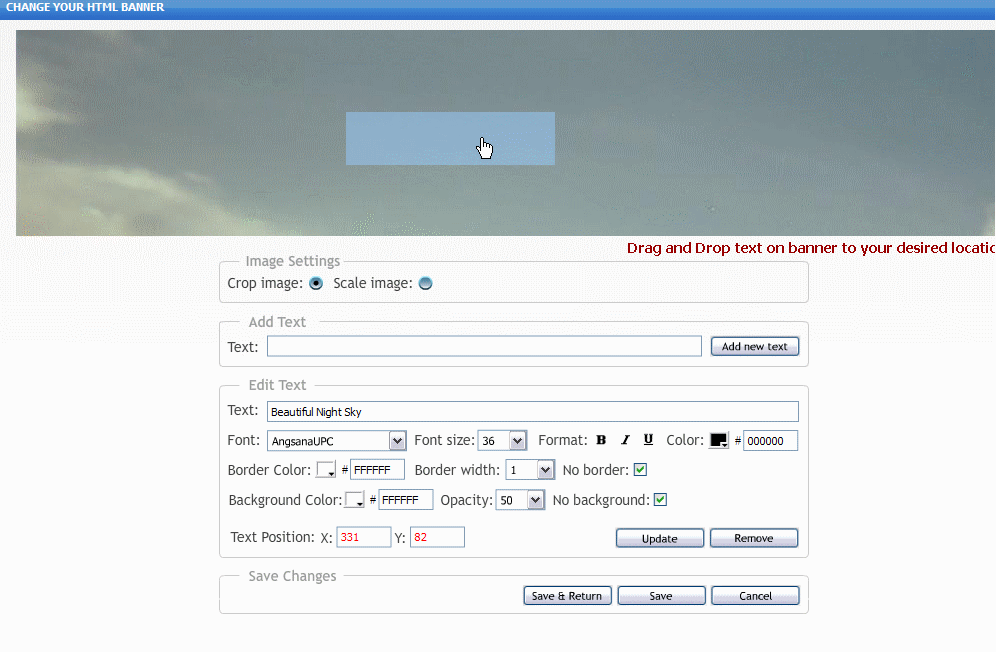
Hold you left mouse clicker down and drag the text to any position you want on the banner. You will notice as you drag the banner the "Text Position" X and Y Coordinates will change. This will allow you to place text in other banners using the exact position you placed it in this banner. Click "Update" after any setting changes
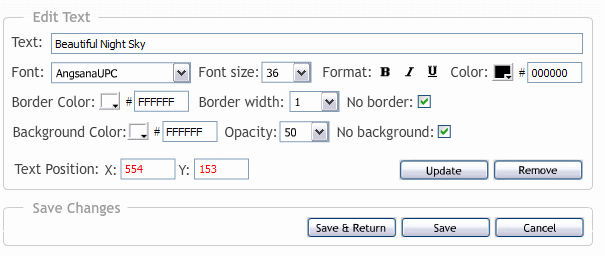
You can then choose to edit the text on the banner using the "Edit text" controls. You can:
Change the Font choosing from several options in the dropdown menu
Change the Font size choosing from several options in the dropdown menu
Change the Format style
Change the Color of the font or enter the color code into the field provided
Change the Border Color of the text or enter the color code into the field provided
Change the Border Width / Thickness or Choose "No Border" (selected on default)
Change the Background Color of the text or enter the color code into the field provided
Change the Opacity (Background color transparency level)
Click Update to view the preview screen
Click "Save" to save the settings or "Save & Return" to go back to the banner creating screen
You can add additional lines of text by going through the steps above and place them wherever you want on the image, like the screenshot below

To change the formatting of any of your text, simply click on the line of text you wish to edit and you will see that it appears in the text block under the ‘Edit Text’ header.
You can then adjust the formatting of this line of text by selecting the various choices that you would like under the ‘Text Settings’ header.
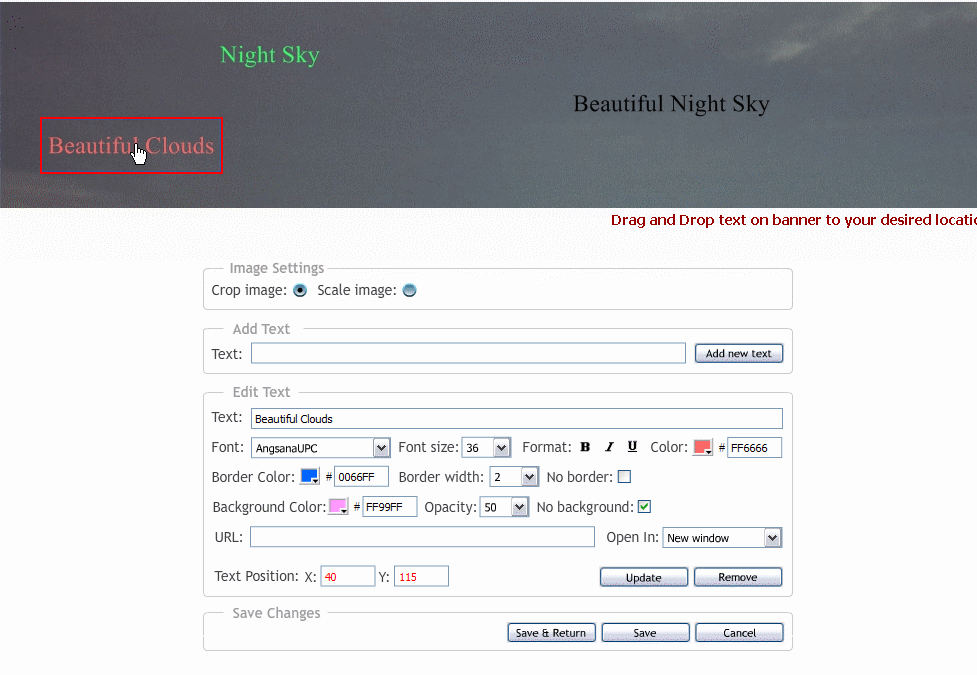
PLEASE NOTE: All text will initially be applied in black. It is highly advisable to move the newly added text away from the top left corner (and changing the font color, if you do not want black font) before adding additional text. This is to assist you in identifying where all of your text lines are.
If required, you can also change your ‘Image Settings’ for the selected image by using the ‘Crop Image’ and the ‘Scale Image’ tools just under the image. These are for use if your uploaded image is a different size to your banner.
If the ‘Crop Image’ checkbox is selected, this will ‘crop’ the image that appears in your banner to the size of the viewable window that you can see on this page.
If the ‘Scale Image’ checkbox is selected, this will ‘scale’ (resize) the image that appears in your banner to the size of the viewable window that you can see on this page.
If your image cannot be adjusted according to the banner size (e.g. it is the same size as the banner), these tools will not be clickable.

Once you have completed these steps, you can either click on the ‘Save’ button and continue your edits, or you can click on the ‘Save and Return’ which will take you to the previous page, to go back to the main banner control panel.
click "Save and Return" on the next screen
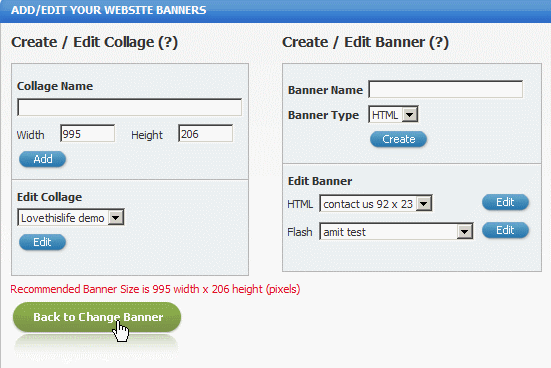
Click "Back to Change Banner'"
Select the page you wish to add your new banner to using the dropdown from "Select Your Page"
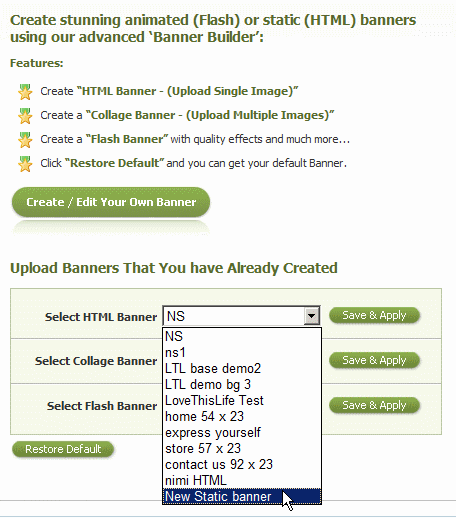
Underneath "Upload Banners That You Have Already Created" in the left hand column, use the dropdown menu next to "Select HTML Banner" to select the banner you wish to add to the page you have selected and click "Save & Apply"
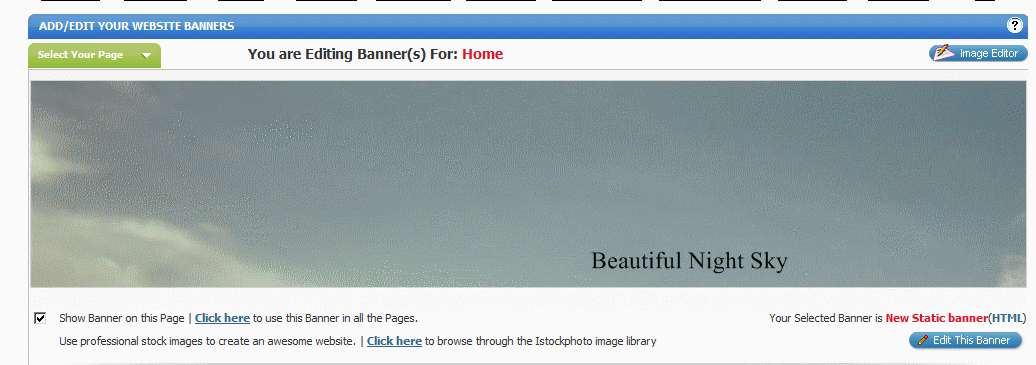
You will see the HTML /Static banner that you created is now added to the preview zone at the top of the page. You can also choose:
"Click Here" to use this banner on all pages. This will automatically add this banner to the top area of each of your web pages
Click "Preview Now" to preview your website with your new HTML / Static banner
To Edit any Flash Banners you have created go to the "Edit Banners" section of the Website Builder. Click on "Create / Edit Your Own Banner" down the left hand side

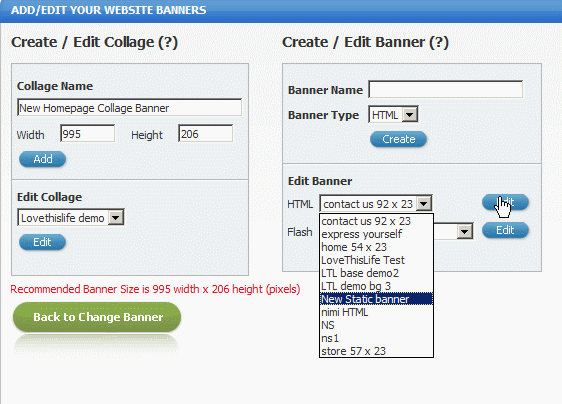
Under "Edit Banner" select the banner you would like to edit from the "HTML" Dropdown Menu and click "Edit"
