
Click 'Start Now' to begin

Choose which Plan you want, the plans are monthly and there is no contract required, its simply month to month

Facebook Page Builder
Build a professional Facebook Page using our advanced Facebook Page Builder. This is a Premium Add-On

Next you will be taken to our template selection screen. Choose a layout which will then present you with many different templates styles and colors for the layout you choose.

After you choose your template you will be taken into the editor screen that looks like below. From this screen you simply click on the sections you would like to setup.

For the module sections you will be prompted to choose which app you would like to display in that section like seen in the below screenshot. After you setup and save the app, it will automatically be applied to that module section. Continue to do this for each section (module) you would like to add content to or skip the sections you do not want to setup. You can add photos, slideshow, text and html, contact forms, videos, Twitter feed, Pinterest and over 20 other Facebook applications.

After you have finished setting up your page, click the next step button located at the bottom of the editor which will take you to a preview screen

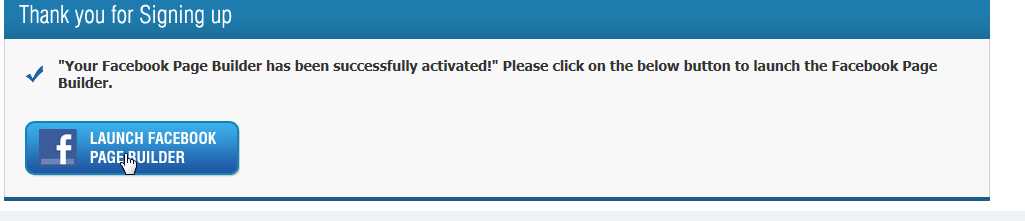
From the preview screen you can choose to publish the page if you are satisfied or you can go back to the editor screen to make changes. Once you have published your page you will be prompted to install it on your Facebook Timeline.
The Facebook Fan Gate is one of the most popular Facebook applications that we offer. A Facebook fan gate allows you to display different content to non fans encouraging them to “like” your page. After they like your page and become a fan, they are then presented with the full page tab that your fans see. Following is a short tutorial that will guide you through how to create a Fan Gate using the Fan Gate Application.
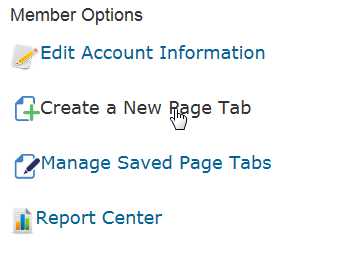
Choose the “Create a New Page Tab” option or you can choose “Manage Saved Page Tabs” if you would like to add the fan gate to a saved page tab you have already created.
You will be prompted to name your page and asked if you would like to setup a fan gate. Choose the “Yes” button from this screen.
This will open up the Fan Gate setup screen like seen below. Here you can upload a main image and add content. You are able to style your content with font styles and colors. You are also able to switch to source view in the editor if you would like to add your own HTML, paste YouTube embed code or add any other html code.

Keep in mind that your fan gate should encourage the visitor to like your page so a good call to action image works well for this. Keep things simple with a good call to action image.
After you have added the content and uploaded an image, click the “Update Fan Gate” button which will present you with a preview of your fan gate page
below.
You can edit your fan gate if needed or click the “Next Step” button to continue to the Timeline tab editor screen where you will be able to setup your full page tab that users see after they “like” your page from the fan gate.
One of the best ways to increase your “likes” and capture leads through Facebook is to run a contest. OnlyBusiness.com offers a contest application that enables you to easily create a contest on your Facebook page in minutes. Following is an overview on how to create a contest on Facebook using the Facebook Contest Application.
Click the “Create a New Page Tab” option from your members main menu.
This will bring you into the first step of the page creation tool where you can name your page and choose if you would like to setup a fan gate. You can setup a fan gate if you would like to request users to “like” your page before they access your contest. Learn more about how to setup a fan gate from here
Next you will be presented with different layout and template choices. Choose the “contest” layout for the best format for displaying contests.
After choosing your template you will be taken to the editor screen. On the editor screen click the “Click To Setup Contest” button which will open the contest setup screen. From here you will be able to easily configure the contest by adding a picture, description, title, start date, end date, terms and confirmation message

Feel free to setup other modules on your contest page such as a header banner, video, Twitter feed, etc. by clicking on the other module blocks within the template editor. After you have setup and added the contest and any other modules within the your page, click the next step button located at the bottom of the editor screen and you will be presented with a preview like seen below.

If you are happy with the preview, click the “Publish Page” button located at the bottom of the preview page. Or you can also click the “Previous Step” button if you would like to go back and make changes.

This will take you to a confirmation screen with a large “Install to Facebook” button. Click this button to install the contest onto your Facebook page.

Now the contest should be installed on your Facebook page as its own tab and you can start promoting it.
SETUP A CUSTOM NAME FOR INSTALLED FACEBOOK APPS
Good News! Facebook now allows you to set a custom tab name for installed Facebook apps. This puts the control into the hands of the page admin rather than the actual application. Follow the simple steps below to change the link name (aka tab name) for an installed application.
1. While logged in as the page admin click the edit page option.
2. Choose the apps menu option located at the left of your Facebook page edit screen.

Facebook Page Application Settings
3. Locate the installed app and click “Edit Settings” for the installed app. This will pop up a window that allows you to change the tab name.

Facebook Page Tab Name
That’s all there is too it! We install the tab on your Facebook page with “Welcome” as the default tab name. Now with these easy steps you can change that Welcome tab name to anything you would like.
You run an eCommerce store front or sell products online, it can benefit you greatly by tapping into the large consumer audience on Facebook. You can easily and quickly add products on Facebook using the products application when creating your store

Following is a quick tutorial on how to setup your store on Facebook
1. After you login to your account, choose the “Create Facebook Page” option from the main members menu.
2. You will now be presented with a data entry screen for setting up your page, adding content, photos and of course products. The most important part in this step is the product/listings module. You need to click on this module from the modules section in order to add products to your Facebook page.

3. Clicking on the products/listings module will open up a screen that will allow you to add products to your page. The manage products screen allows you to add multiple products and for each product you are able to specify the product name, description, price, upload a photo, set the buy url and even setup the buy button name. In addition you can choose to display a Facebook like button, social network share button and a Facebook comment box for each product you add

4. After adding your products you can proceed to the next step or you can setup additional modules, videos and photos. Proceeding to the next step will present you with multiple templates choices for your Facebook product page. We suggest choosing one of the product/listing templates which will showcase your products front and center. We offer multiple Facebook product templates in different color schemes
.Facebook Store Blue Template |
Facebook Products Silver Theme |
Facebook Store Red Template |
After choosing your desired template, simply click the publish to Facebook button and easily install your store on Facebook.
See also